How to Change Your Minecraft Name (With Step-by-Step Screenshots)
Disclosure: This page contains affiliate links and I may earn a commission if you click on them and make a purchase. This comes at no additional cost to you and allows me to continue to run this website. Lastly, please do not copy, modify, and/or redistribute my content and claim as your own. For info on photo/video sharing, see the terms and conditions page. Thanks for your support!
If you’ve outgrown your username or simply just looking for a change, Mojang, fortunately, allows users to change their Minecraft username. It’s important to keep in mind that you’re only allowed to do this once every 30 days, so make sure you find a username that you’re comfortable with! To learn how to change your Minecraft name, follow the step-by-step instructions below.
How to Change Your Minecraft Name (Step-by-Step) Tutorial
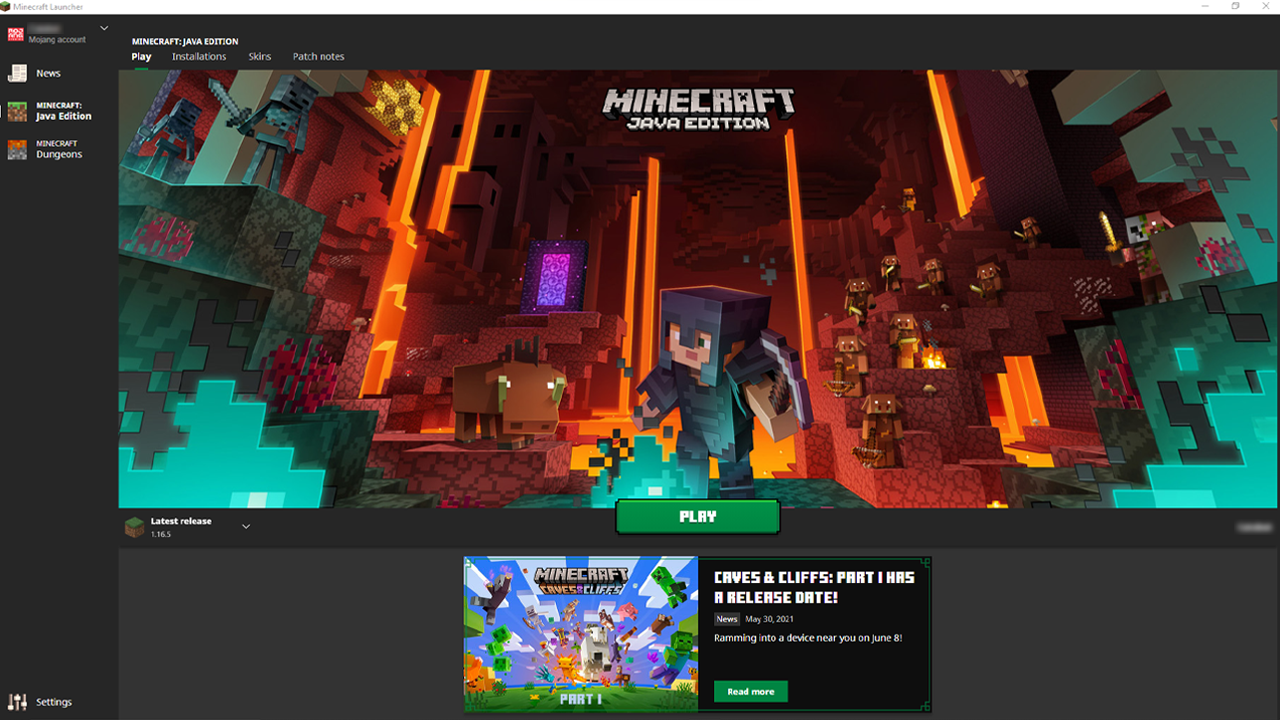
To change your Minecraft name, start by opening up your Minecraft launcher.
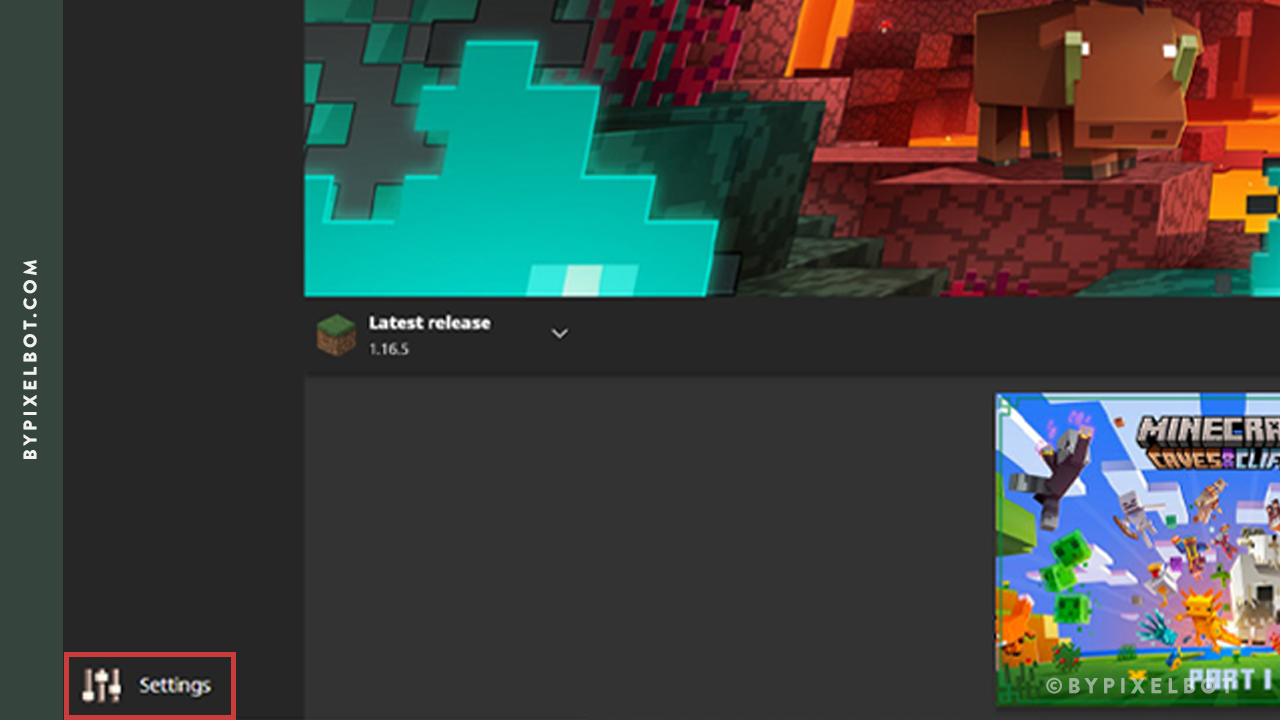
Then, click on “Settings” on the bottom left of the Minecraft launcher.
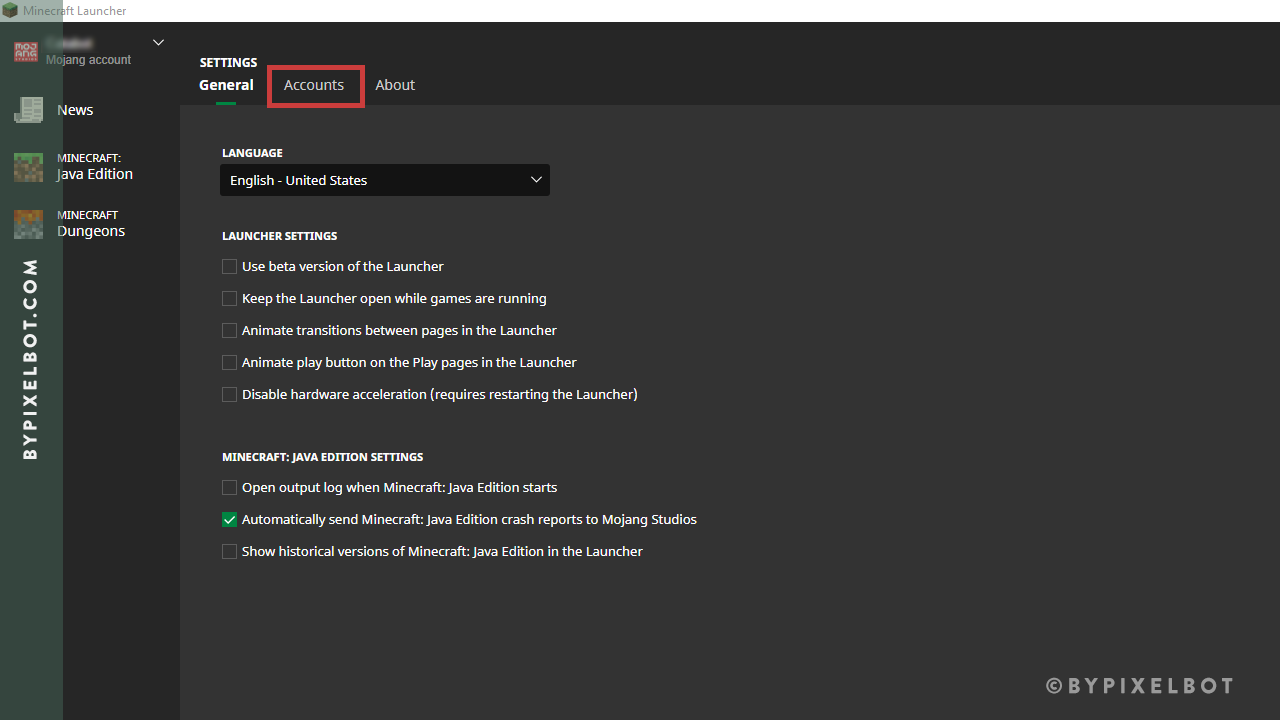
Then, click on the “Accounts” tab.
Choose the Minecraft account you want to change the name to and then click on the three dots next to it.
Then, click on “Manage account”.
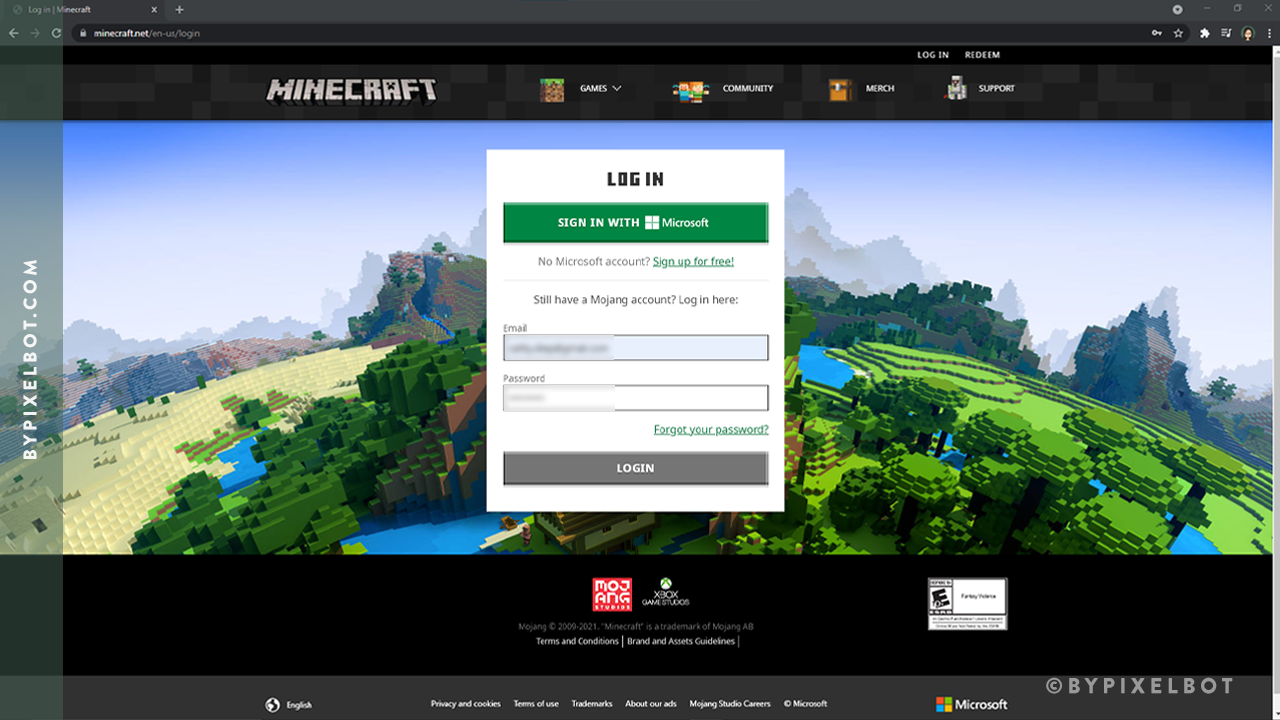
Afterwards, you’ll be redirected to the login page on Minecraft’s official website. Enter your current username and password to sign in.
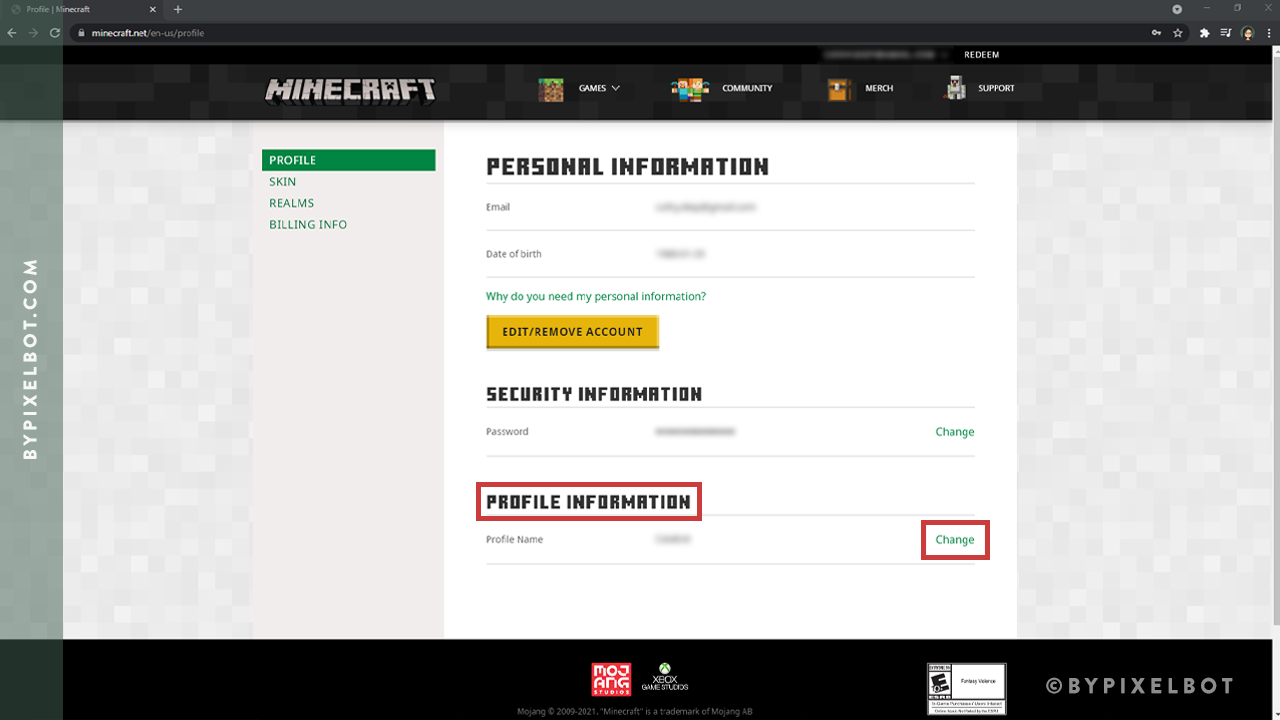
Under “Profile Information”, you’ll see your current Minecraft username. Click on “Change” next to your current Minecraft username.
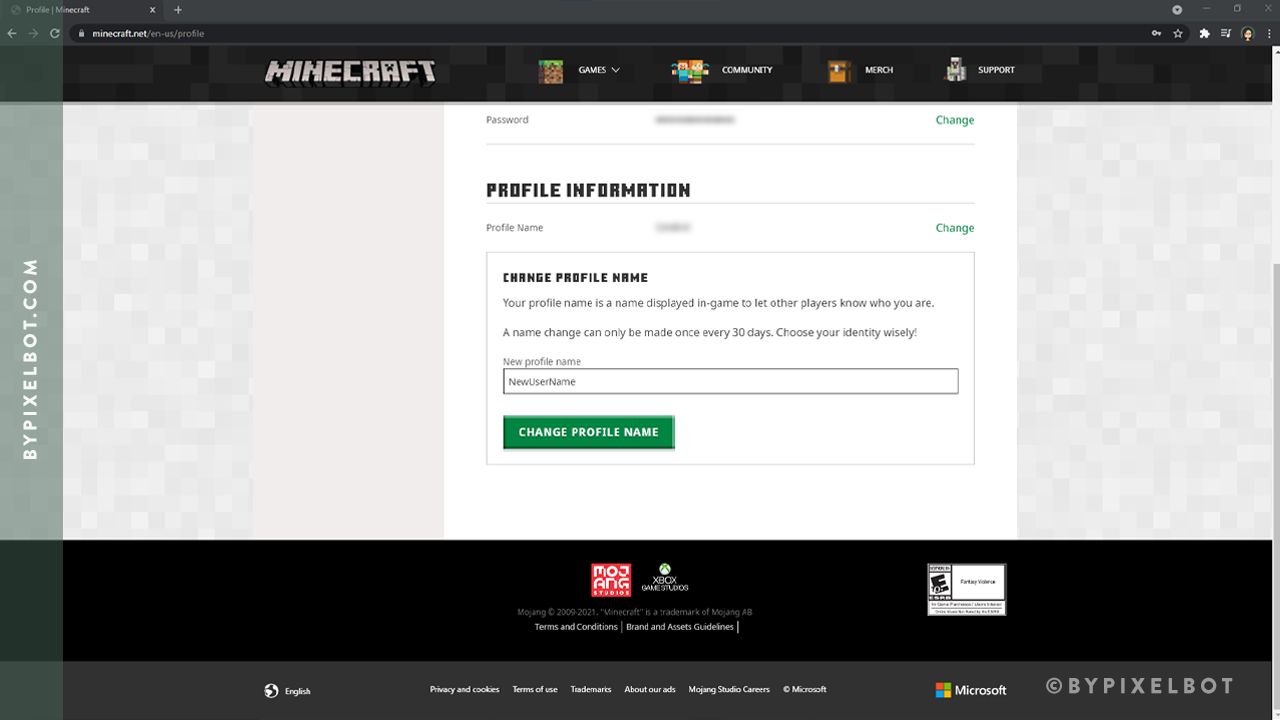
Then, type in your new username and click “Change Profile Name”. Keep in mind that you can only change your name once every 30 days, so make sure it’s the name you want. :) And you’re done!
Did you find this tutorial helpful? Let me know! I’d love to hear from you.
TIP: Pin this image below by hovering over it to save it to your Pinterest account and refer back to it later.

